Magento
This page describes how to install and configure Zapper as a payment method on the Magento eCommerce platform.
Overview
Magento
Magento Commerce, as highlighted on Adobe's platform, is a robust eCommerce solution that empowers businesses with a comprehensive set of features. Designed to fuel online growth, it offers a personalized shopping experience, powerful merchandising tools, and efficient order management. With capabilities for B2B and B2C businesses alike, Magento Commerce ensures seamless integration across various channels and devices. Its flexibility and scalability make it a go-to choice for businesses seeking to elevate their digital presence and achieve eCommerce success.
Zapper Payment Plugin
The Zapper payment method for Magento now introduces a broader spectrum of payment choices. Alongside our existing interactive dynamic QR code option, customers can now also make use of a convenient card payment feature during checkout. This means that whether customers prefer the simplicity of scanning a QR code using the Zapper mobile app or directly entering their card details, the payment process is streamlined and adaptable. This versatile approach enhances the ease of contactless payments and enriches the shopping experience for all customers. Learn more about the payments flow here
This guide is composed of the following sections:
Pre-requisites - The pre-requisites required before the Zapper payment method can be used in production.
Installation - Downloading and installation of the Zapper payment method.
Configuration - Configuration of the Zapper Payment method with the merchant's Zapper credentials.
Checkout and Payments - The customer experience when making use of the Zapper payment method.
1. Pre-requisites
The merchant must be registered as a Zapper Merchant to use the Zapper payment method in production.
The merchant must be able to log in to the Zapper Merchant Portal.
2. Installation
To install the Zapper Magento payment method you will need to download the archive containing the plugin files and copy it into the app code directory. Correct all file permissions and enable the plugin using the Magento CLI. These steps are detailed as follows:
1. Download the zapper payment method
zapper-magento-1.1.1.zip or run the following command
2. Extract the archive
A folder with the "app/code" directory structure and plugin nested within will be produced.
Avoid copying this directly over the magento/app/code directly as there may be other modules within that could be overridden and it could break file ownership permissions.
3. Move into app code
Within the extracted directory there is a ZapperIntegration module directory (app/code/ZapperIntegration). Move the ZapperIntegration directory into your Magento app code directory.
This should look something like the following example.
4. Change file permissions
Change the file ownership to the user configured to run the Magento plugin. This could typically be the Apache user or a Magento user.
Be sure to use the user you have configured to run the Magento process
Be sure to include the recursive flag -R
5. Ensure the module has been placed correctly (optional)
If the module is in the correct location it will show up as a disabled module, typically at the end of the list.
To check the status run the following command from the Magento directory
6. Enable the payment method
From the Magento directory run the module:enable command
7. Magento setup upgrade
The final step to activating a module in Magento will be running the setup:upgrade command from the Magento directory
3. Configuration
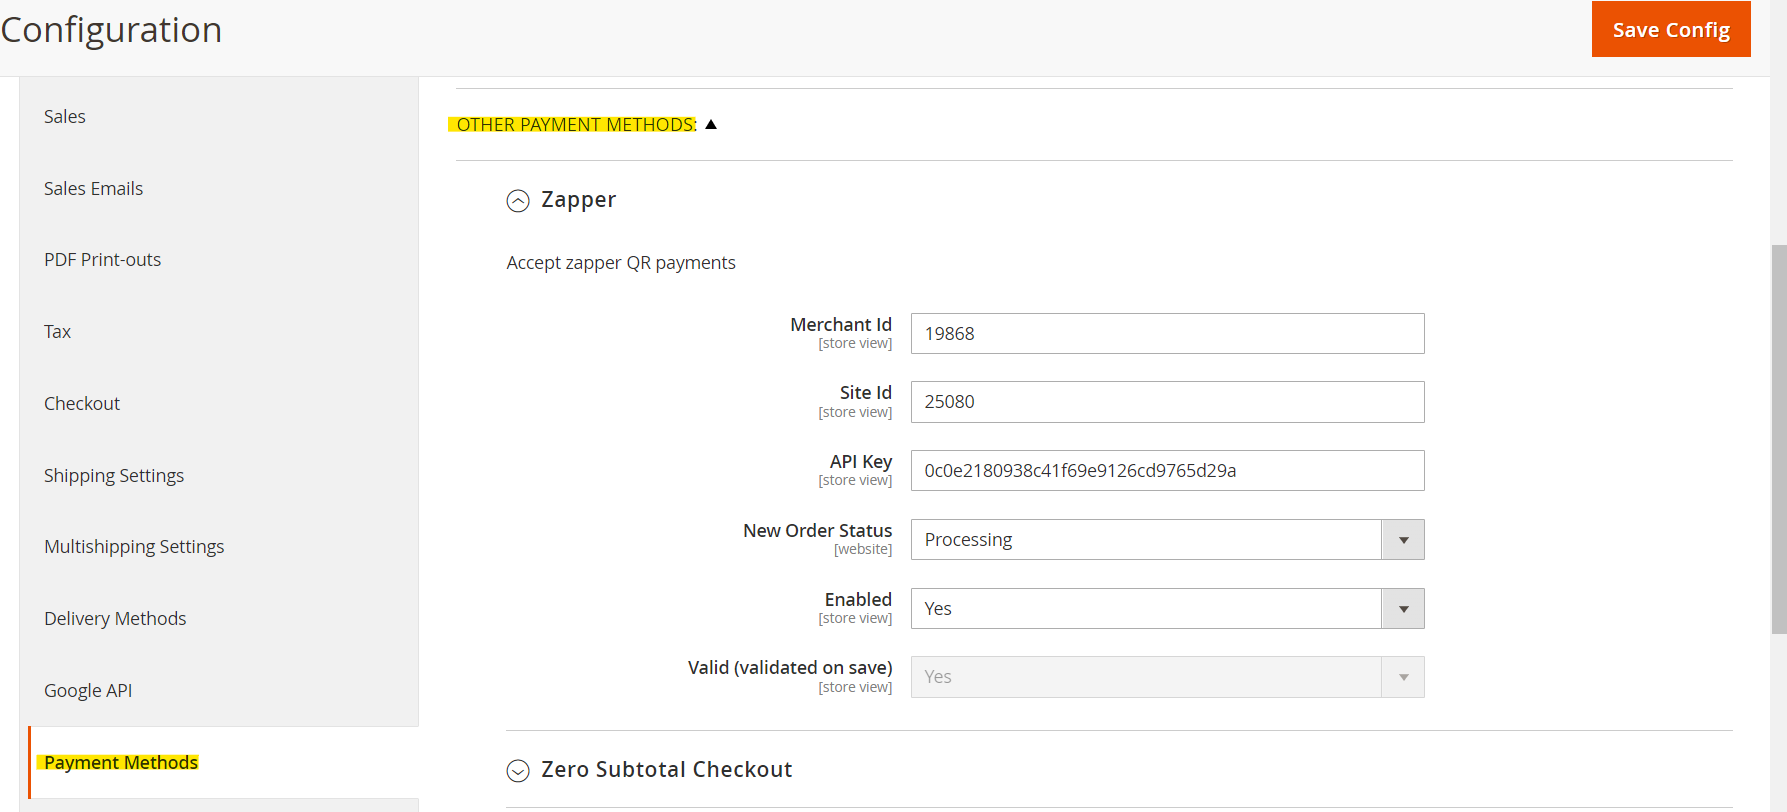
Once the Zapper payment method is installed, the payment method must be configured within the Magento admin using the Zapper merchant credentials obtained from the Zapper Merchant Portal. These steps are detailed as follows:
On the Magento admin page, navigate to Stores -> Configuration -> Sales -> Payment Methods -> Other Payment Methods --> Zapper.
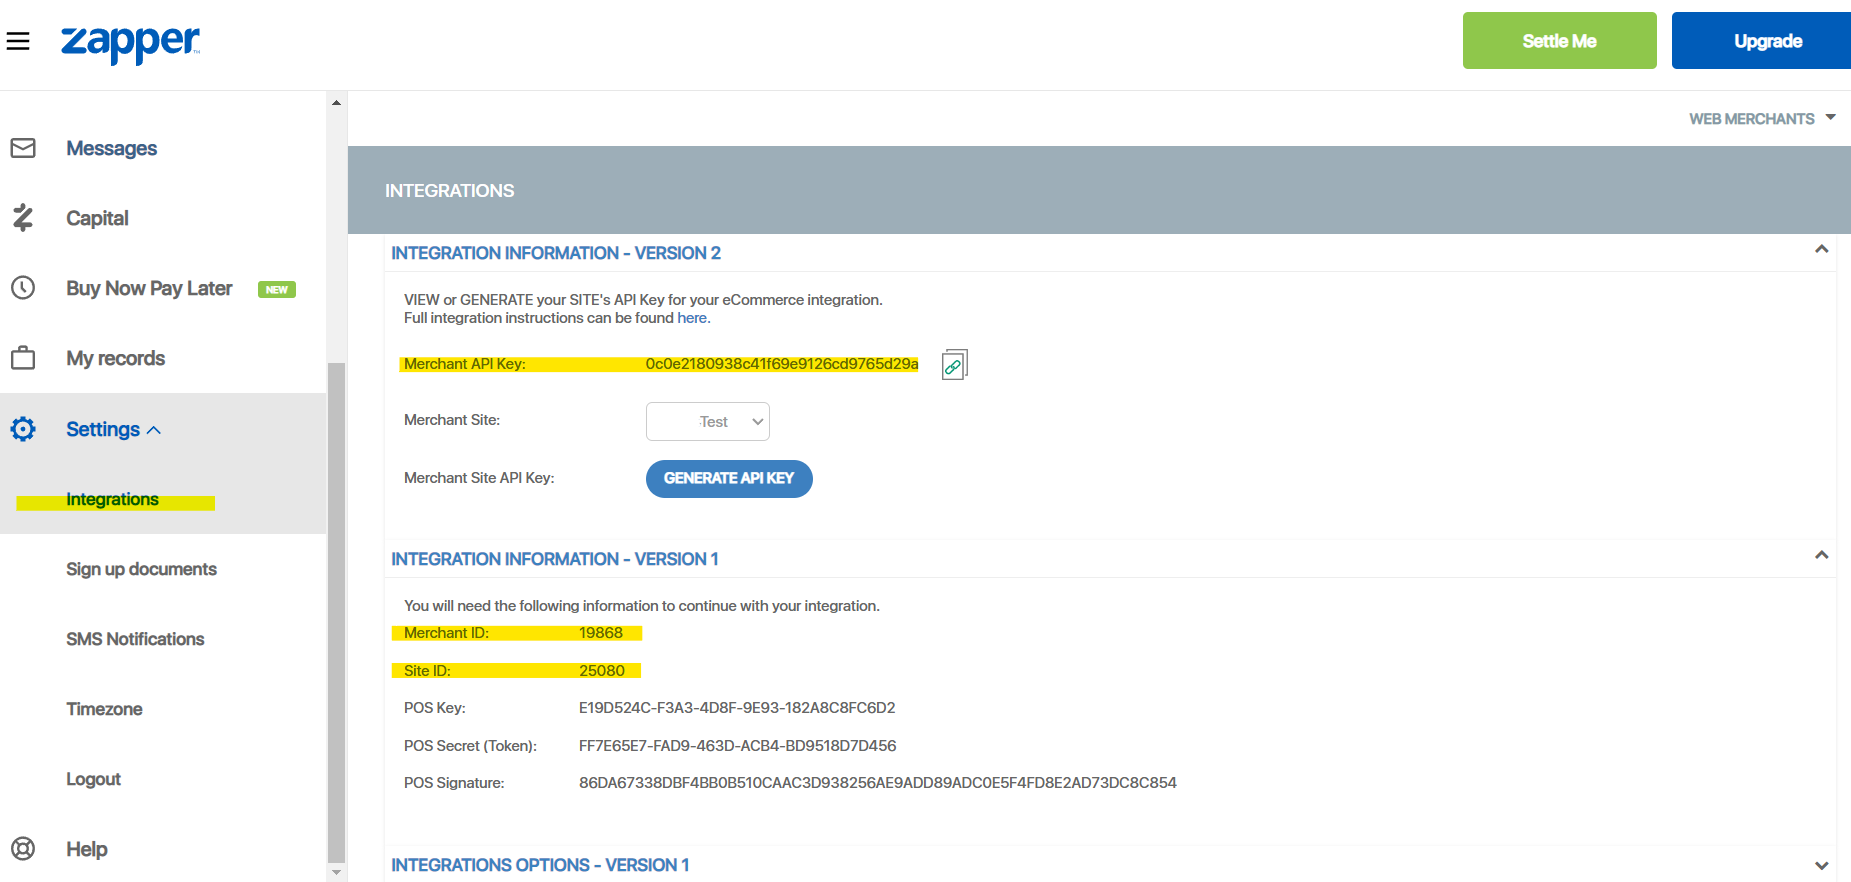
Populate the details required by obtaining them from Zapper Merchant Portal and navigating to Settings --> Integrations. The following 3 items must be obtained from the Merchant portal (see image below):
Merchant ID
Site ID
API Key
Set the "New Order Status" according to your preference (when a payment is completed using the Zapper payment method, the order status will be set to the value configured here, for example "Processing").
Set "Enabled" to "Yes".
Save the config.
The "Valid" indicator should switch to "Yes" provided all the details have been entered correctly. If it reads "No" the Zapper payment method will not be presented as an option at checkout, even if marked as enabled.
4. Checkout and Payments
Once the installation and configuration has been completed, the merchant is ready to accept Zapper payments. The following sections describe the customer experience during the checkout and payment process.
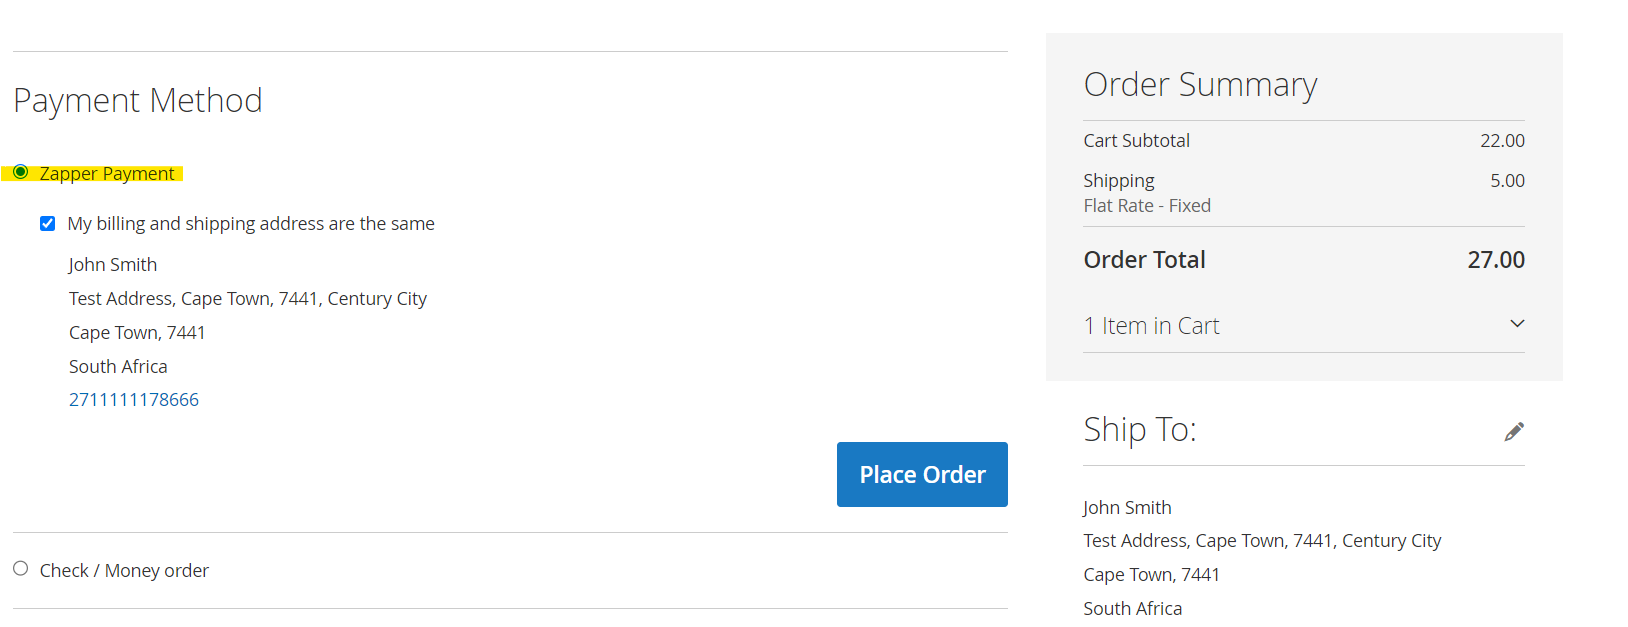
4.1 Checkout
Checkout page may differ slightly based on the theme.
On Checkout the user will be provided with "Zapper Payment" as a payment method option. The following image is an example of the payment options on the Magento checkout page:
4.2 Payments
The payment process is as follows:
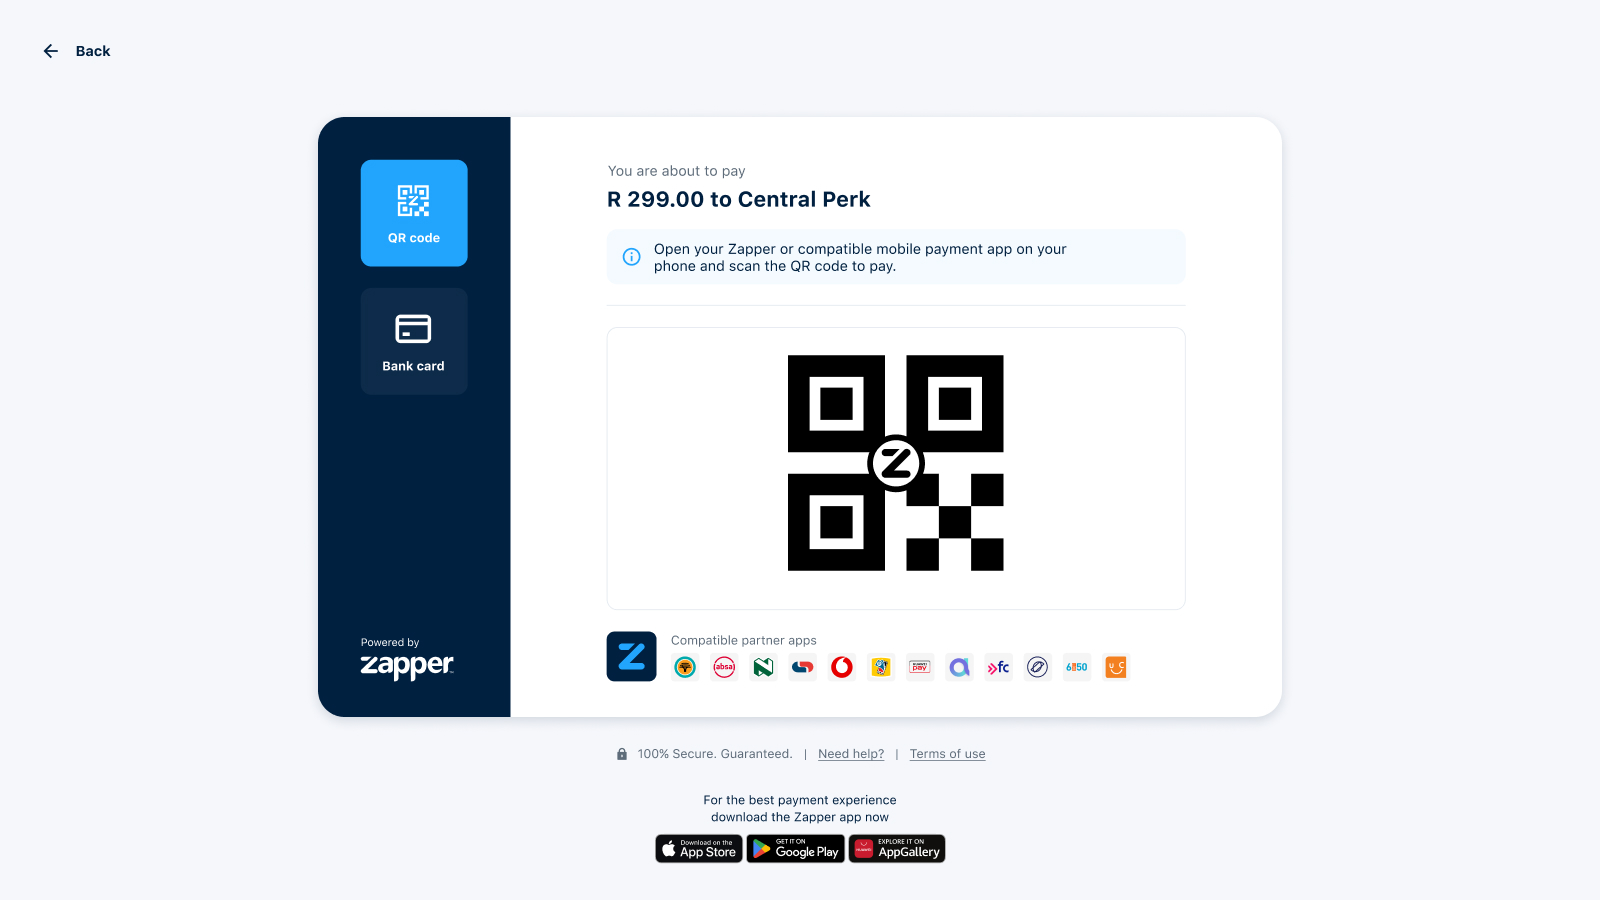
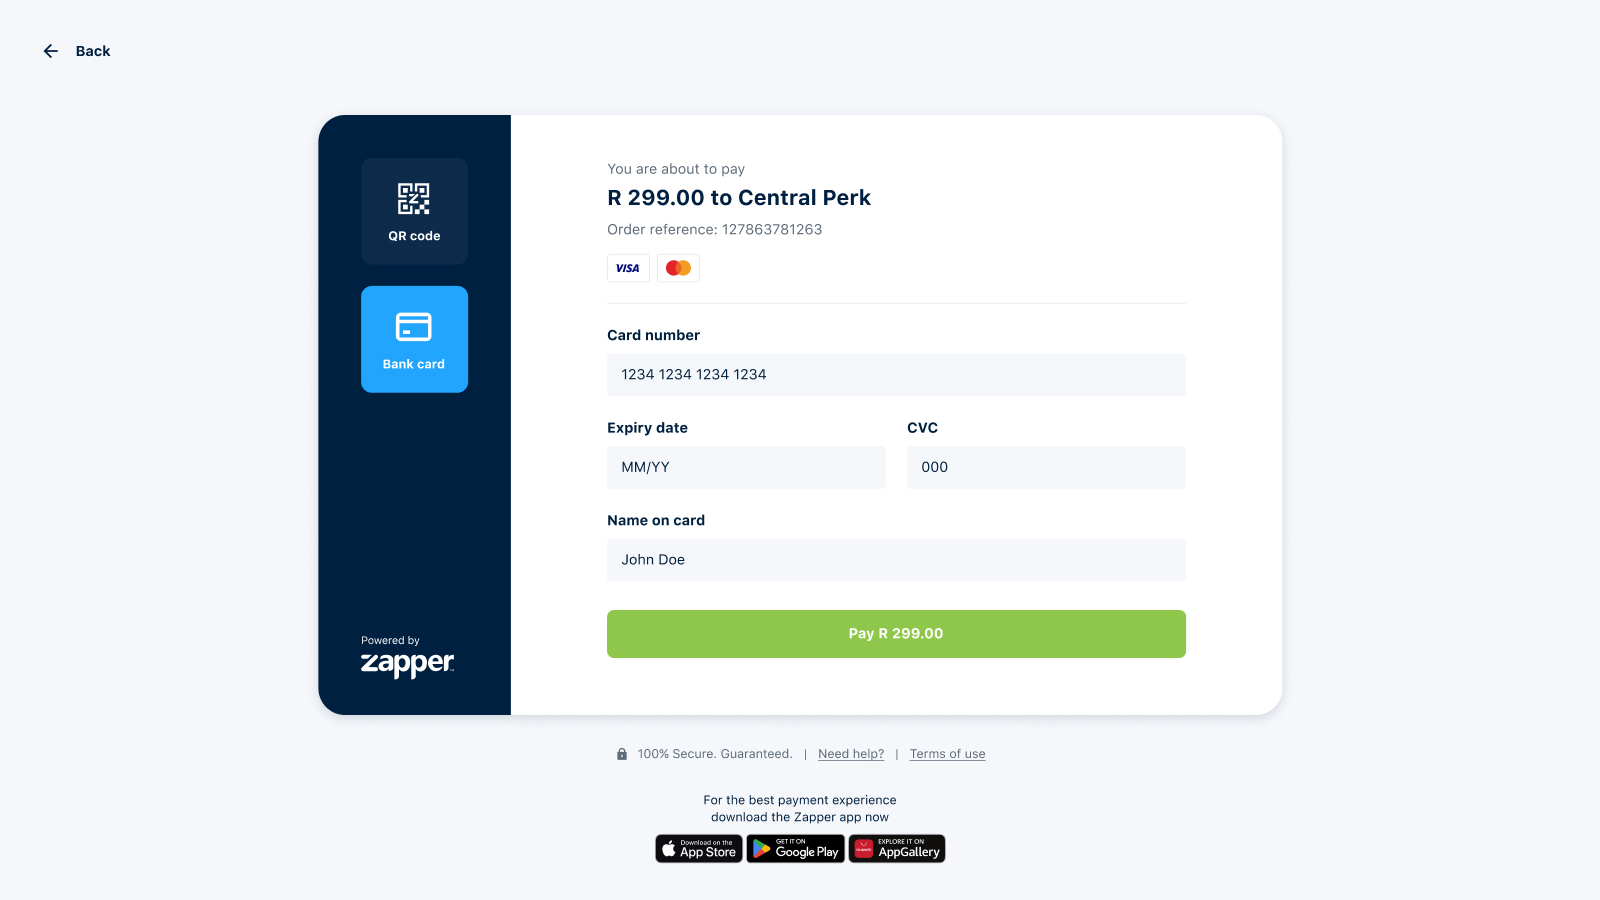
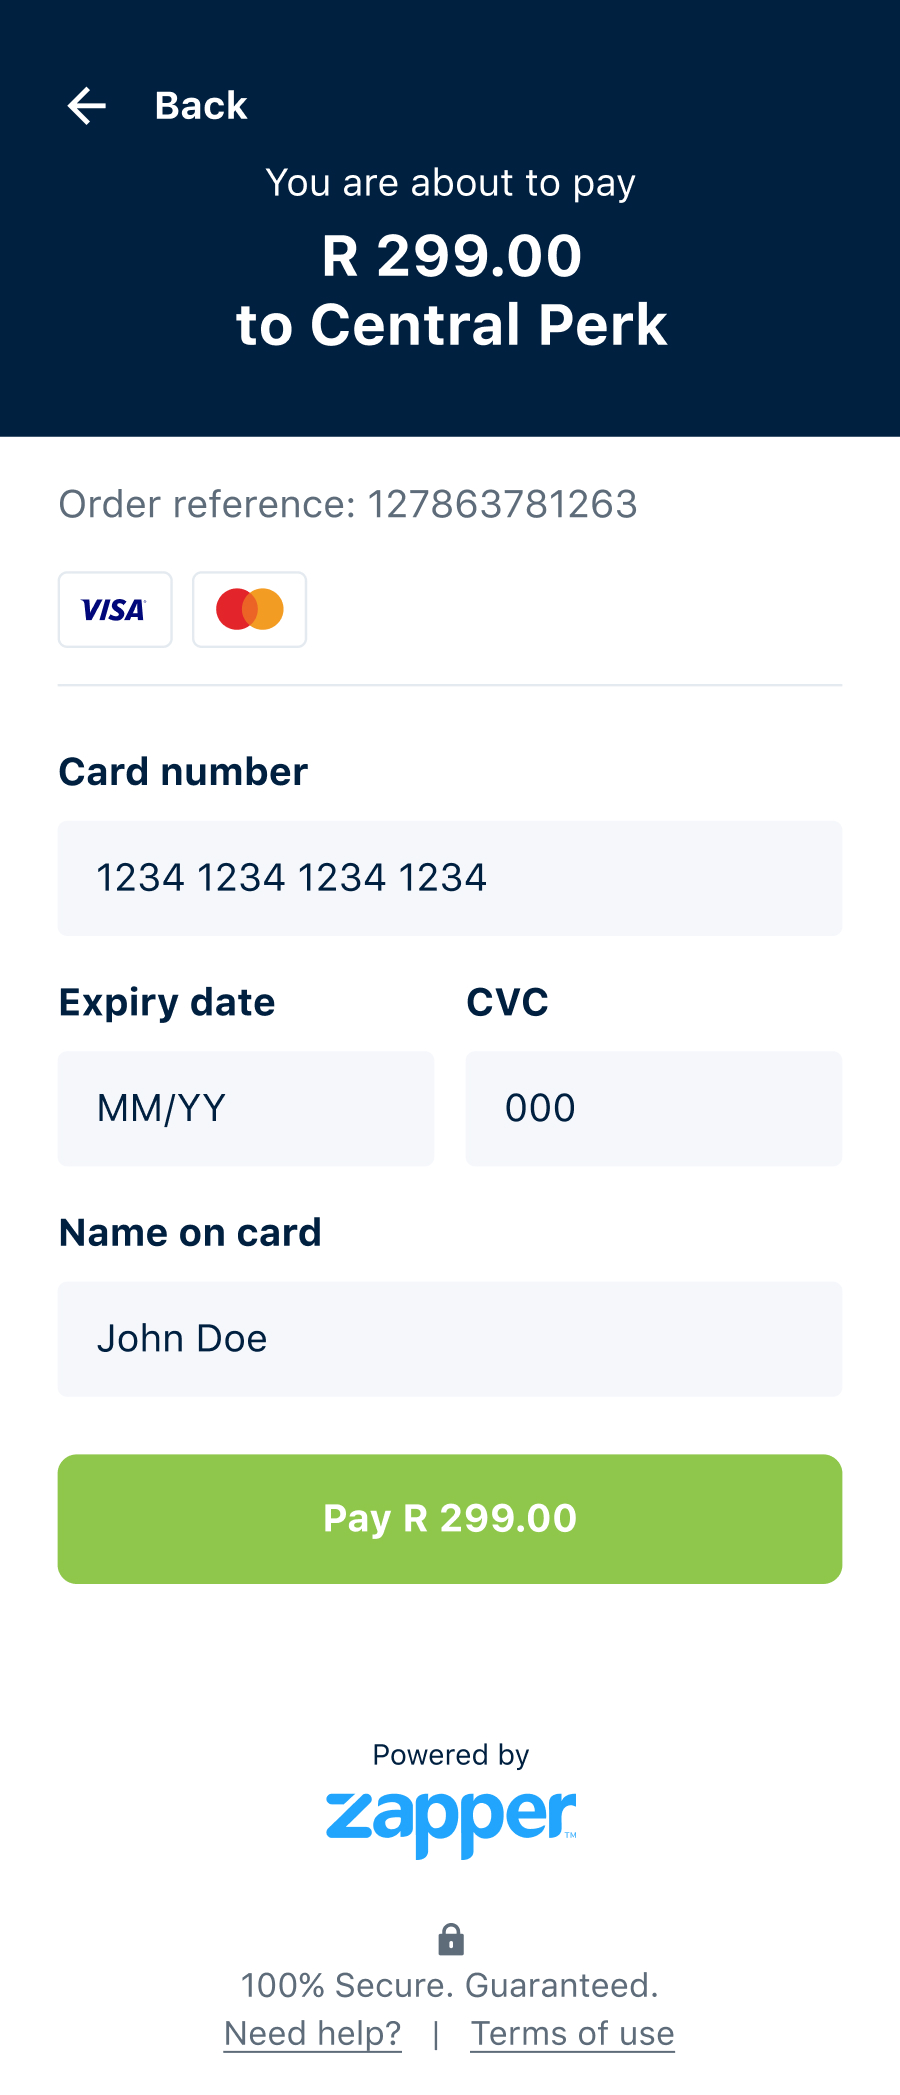
When the user selects the Zapper payment option on checkout and proceeds to finalize their order, they will be presented with Zapper Hosted Payment page.
If the user prefers the familiar convenience of our dynamic QR code solution, they can proceed by using the Zapper mobile app to effortlessly scan the on-screen QR Code. For users accessing the store from a mobile device, the QR Code is seamlessly replaced with a deep-link button, ensuring a smooth transition to the Zapper application.
However, if the user prefers to use their credit or debit card for payment, they can now opt for the new card payment option. This straightforward method allows users to directly input their card details and complete the payment process right on the spot.
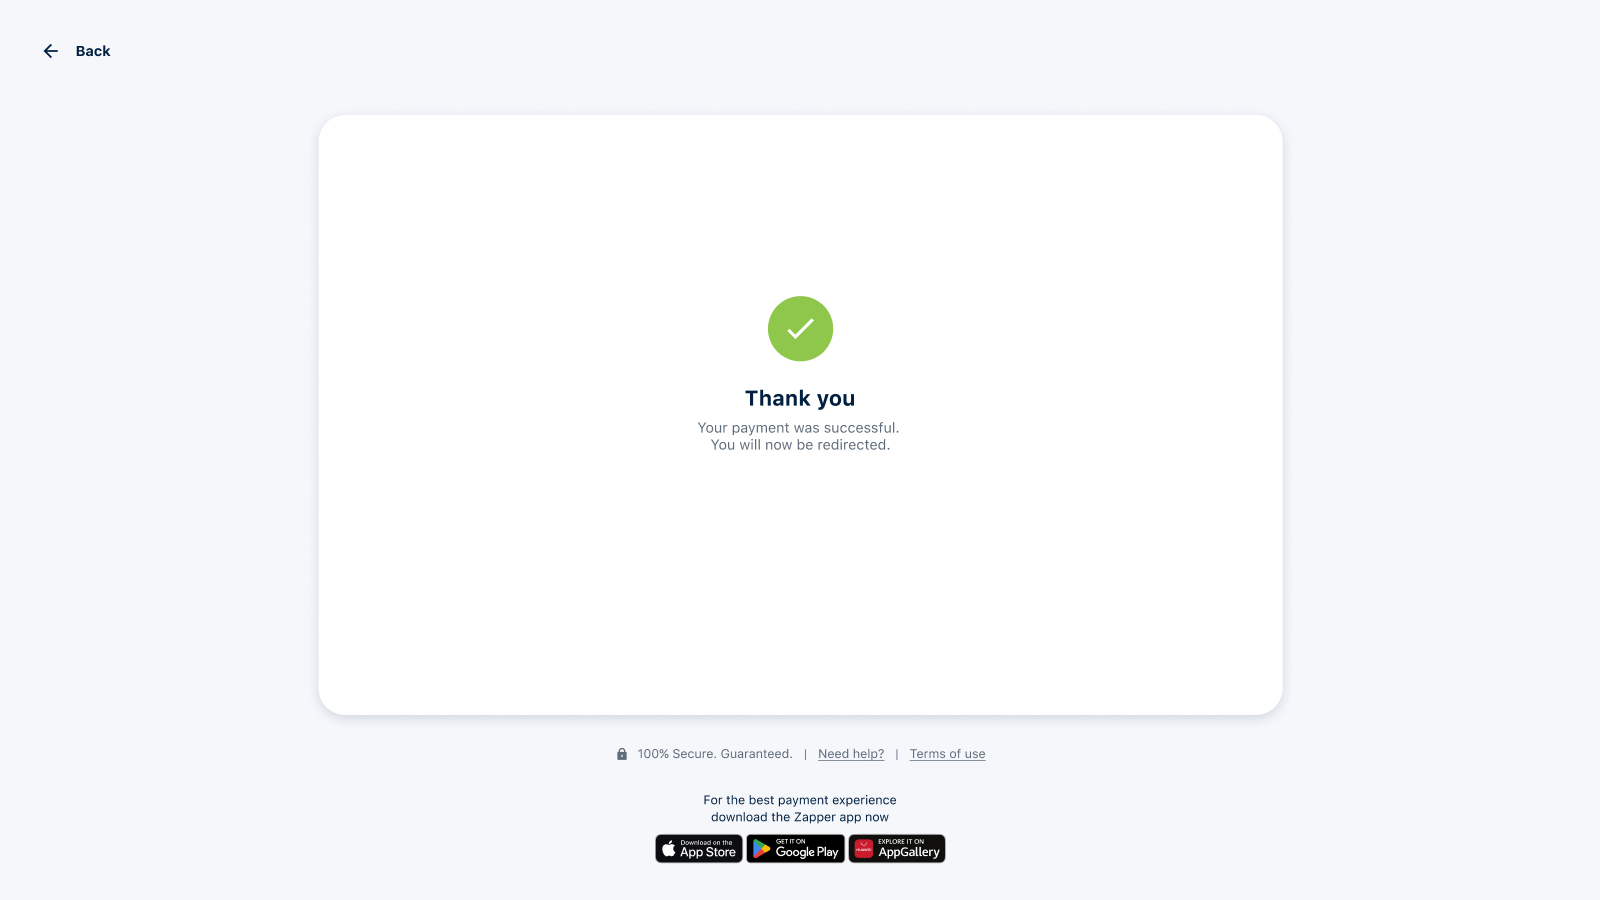
Once the payment is successfully processed – whether through QR code scanning or card payment – users will receive a confirmation in the form of a checkmark symbol. With this assurance of payment, they will then be seamlessly redirected back to the store's default payment confirmation page.
By introducing this new card payment option alongside our existing QR code solution, we're committed to delivering a more inclusive and user-friendly payment experience that caters to a diverse range of customer preferences.
The order on the merchants store will automatically be updated to the "New Order Status" value that was configured in section 3. Configuration -> step 3 above.
Last updated